Both are smart wall switches, the main functions are the same, but the former is the need to connect the neutral wire and the live wire, the latter only need to be connected to the live wire, you need to choose according to the wiring of your home.
Both are smart wall switches, the main functions are the same, but the former is the need to connect the neutral wire and the live wire, the latter only need to be connected to the live wire, you need to choose according to the wiring of your home.
The wall switch is connected to wires. Its most important function is to be able to remotely and intelligently control the power supply and power-off of the connected circuit. If the ordinary light is converted into a smart light, the wall switch is required;
The wireless switch is a remote controller that can control devices such as wall switches through the APP settings, but cannot directly control the ordinary lights separately.
The Smart Wall Switch H1 Pro (With Neutral) supports to upgrade the switch panel to the scene panel with the corresponding number of the switches, for example, the panel of the Smart Wall Switch H1 Pro (With Neutral, Double Rocker) can be upgraded and replaced with the panel of the Scene Panel S1 (Double Switch).
The Smart Wall Switch H1 Pro (With Neutral) supports to upgrade the switch panel to the scene panel with the corresponding number of the switches, for example, the panel of the Smart Wall Switch H1 Pro (With Neutral, Double Rocker) can be upgraded and replaced with the panel of the Scene Panel S1 (Double Switch).
The wall switch will not work normally and the indicator red light is always on. After the switch panel or the power module is matched correctly , it recovers to work normally.
The wall switch will not work normally and the indicator red light is always on. After the switch panel or the power module is matched correctly , it recovers to work normally.
If you want to get satisfied gang-installation effect, you need to separately purchase a Aqara gang frame for installation. Smart Wall Switch H1 can be installed in gang with Aqara Scene Panel S1 and Smart Thermostat T1 to obtain a richer and more convenient smart control experience.
If you want to get satisfied gang-installation effect, you need to separately purchase a Aqara gang frame for installation. Smart Wall Switch H1 can be installed in gang with Aqara Scene Panel S1 and Smart Thermostat T1 to obtain a richer and more convenient smart control experience.
Smart Wall Switch H1 (With Neutral, Triple rocker) as example: There are 5 wiring holes on the back, which are N, L, L3, L2, and L1. The L hole is connected to the live wire, the N hole is connected to the neutral wire, and the L1&L2&L3 holes are respectively connected to the load lines of the Three lights; L1 is assigned to the left button of the switch panel,L2 is assigned to the middle button of the switch panel, and L3 is assigned to the right button of the switch panel.
Smart Wall Switch H1 (No Neutral, Triple rocker) as example: There are 4 wiring holes on the back, which are L, L3, L2, and L1. The L hole is connected to the live wire, and the L1&L2&L3 holes are respectively connected to the load lines of the Three lights; L1 is assigned to the left button of the switch panel,L2 is assigned to the middle button of the switch panel, and L3 is assigned to the right button of the switch panel.
Smart Wall Switch H1 (With Neutral, Triple Rocker) as example: Connect the live wire and the neutral wire into the L hole and the N hole respectively, and connect the load lines of the lights into the L1, L2 or L3 hole. Use a flat-blade screwdriver to pry up the slot on the switch panel, open the panel, fix the wall switch into the installation box in the wall or on the gang frame (The gang frame needs to be purchased separately) with the enclosed screws, and cover the switch panel.
Smart Wall Switch H1 (No Neutral, Triple Rocker) as example: Connect the live wire into the L hole, and connect the load lines of the lights into the L1, L2 or L3 hole. Use a flat-blade screwdriver to pry up the slot on the switch panel, open the panel, fix the wall switch into the installation box in the wall or on the gang frame (The gang frame needs to be purchased separately) with the enclosed screws, and cover the switch panel.
The live wire is normally red, the neutral wire is usually black or blue and the load wire is usually green or yellow. We suggest you install the switch after a professional electrician has tested the wires using instruments such as voltmeter.
The live wire is normally red, the neutral wire is usually black or blue and the load wire is usually green or yellow. We suggest you install the switch after a professional electrician has tested the wires using instruments such as voltmeter.
Smart Wall Switch H1 (With Neutral): If the load line and the neutral line are swapped, the power-on indicator may work normally, but when the relay is turned on, the switch will burn out. For other wrong installations, the wall switch may not work. Please strictly follow the instructions for wiring, or ask a professional to install it!
Smart Wall Switch H1 (No Neutral): If the load line of the light is mistakenly connected to the L hole or the live wire is mistakenly connected to L1 or L2, it will not short out, but it may cause the switch to become unresponsive. It can be used after it is correctly connected. Please strictly follow the instructions for wiring, or ask a professional to install it!
The Smart Wall Switch T1 must be connected to the compatible hub to achieve functions such as coordinated and remote control. After the switch wiring is completed, please open the APP client port, enter the compatible hub, click Add Sub Device, select the corresponding wall switch in the options, and follow the prompts: long press the switch button for more than 8 seconds until the red light is always on for 1 second and the blue light is always on for 1 second, and then the blue light flashes fast. When they are connected successfully, the phone will prompt "connected successfully".
The Smart Wall Switch T1 must be connected to the compatible hub to achieve functions such as coordinated and remote control. After the switch wiring is completed, please open the APP client port, enter the compatible hub, click Add Sub Device, select the corresponding wall switch in the options, and follow the prompts: long press the switch button for more than 8 seconds until the red light is always on for 1 second and the blue light is always on for 1 second, and then the blue light flashes fast. When they are connected successfully, the phone will prompt "connected successfully".
The effective distance between the two devices is 7 to 10 meters with a wall seperating them. If more walls are between the two devices, we recommend shortening the distance.
The effective distance between the two devices is 7 to 10 meters with a wall seperating them. If more walls are between the two devices, we recommend shortening the distance.
The Smart Wall Switch H1 (With Neutral, Single/Double/Triple Rocker) Because the switch is connected to the neutral line and the live line, there is no minimum load requirement. However, the maximum load of the total channels cannot exceed 2200W.
The Smart Wall Switch H1 (No Neutral, Single/Double/Triple Rocker) Under normal circumstances, each channel can load a minimum of 3W energy-saving light or 5W LED light or 16W fluorescent light. However, for some niche brands or poor-quality lights, even if the power is greater than the above requirements due to the internal circuit design, it may cause abnormalities, such as light flashes and switch freezes. Please choose carefully.
Warm reminder: If it is an old-style light with a starter, please replace it with the electronic starter.
When the power of the light, connected to the Smart Wall Switch H1 (No Neutral), is lower than the minimum power requirement, it will randomly flash when the switch turns off. In addition, the Smart Wall Switch H1 (No Neutral) has better support for mainstream brands of lights, but for niche brands or knockoff factories, due to the internal circuit design and material problems, it may cause abnormalities such as the light flashes and the switch freezes. Please choose carefully.
When the power of the light, connected to the Smart Wall Switch H1 (No Neutral), is lower than the minimum power requirement, it will randomly flash when the switch turns off. In addition, the Smart Wall Switch H1 (No Neutral) has better support for mainstream brands of lights, but for niche brands or knockoff factories, due to the internal circuit design and material problems, it may cause abnormalities such as the light flashes and the switch freezes. Please choose carefully.
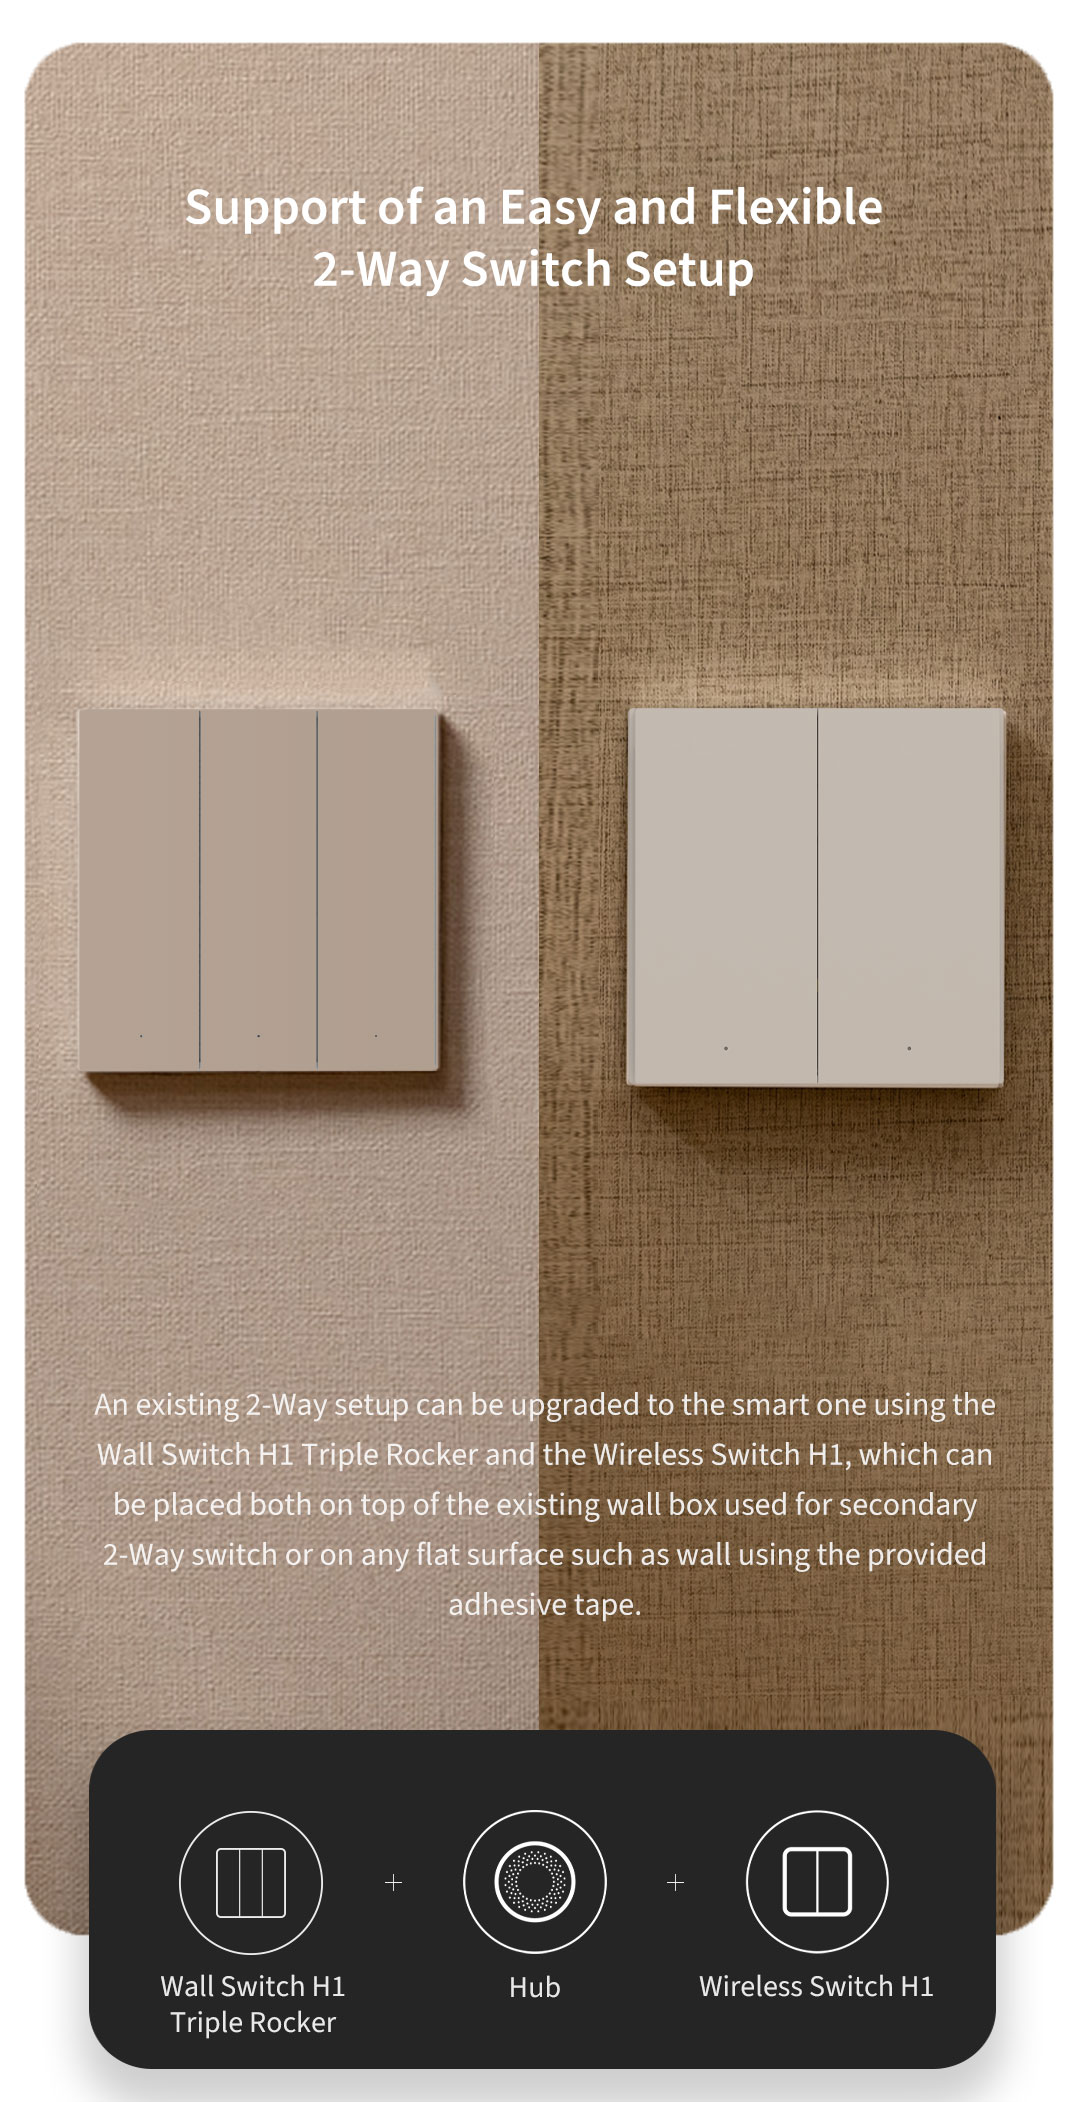
First, by using the Smart Wall Switch H1 in combination with a wireless switch, it is very easy to achieve dual-control / multi-control. The wireless switch can be placed at most positions of your home to coordinately control the Smart Wall Switch H1;
Second, if the original switches are dual-control ones, only replace one of them with the Smart Wall Switch H1, keep the other ordinary switch short circuit, and replace it with a wireless switch. Otherwise, when the other end powers off, the ZigBee communication module of the Smart Wall Switch H1 cannot power on, so it cannot be controlled automatically.
Hello, we use cookies to create the most secure and effective website possible. By using this site, you consent to the use of cookies. Read our
Privacy Policy.